
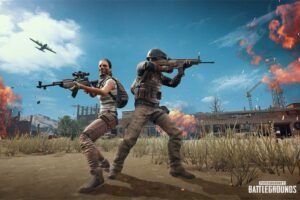
PUBG Loot Guide: Best Landing Spots, Weapons, Attachments and Survival Tips
PUBG is a battle royale game where every decision can affect the outcome of a match. From the moment players leave the aircraft to the final circle, survival depends on a combination of movement, strategy, equipment, map knowledge, aiming ability, and smart decision-making. One of the most important parts of the game is looting. The equipment you collect during the first few minutes can determine whether you are ready for an early fight or forced to avoid enemies until you find better supplies.
However, successful looting is not simply about collecting as many items as possible. Experienced PUBG players understand that efficient looting means finding the right equipment quickly, managing backpack space, selecting weapons that match their play style, and leaving dangerous areas before opponents can surround them. A player who spends too much time searching for perfect attachments may lose valuable time and become vulnerable to enemies or the shrinking play zone.
This PUBG loot guide explains how to choose landing locations, prioritize equipment, build effective weapon combinations, manage ammunition, use attachments, and prepare for the final stages of a match. Whether you are a beginner learning the fundamentals or an experienced player looking to improve consistency, these strategies can help you make better decisions throughout a PUBG match.
Why Looting Is So Important in PUBG
Loot provides the tools required to survive. Weapons allow you to defend yourself, armor reduces incoming damage, helmets protect against headshots, healing items restore health, and attachments can make weapons easier to control. Without sufficient equipment, even excellent positioning may not be enough to survive a difficult encounter.
The challenge is finding a balance between preparation and speed. You want enough equipment to fight, but you do not want to spend several minutes inside the same building while other players rotate into your area.
| Loot Type | Importance | Reason |
|---|---|---|
| Primary Weapon | Very High | Provides your main source of damage. |
| Secondary Weapon | High | Offers another option for different ranges. |
| Armor | Very High | Improves protection against incoming damage. |
| Helmet | Very High | Provides head protection. |
| Healing Items | Very High | Allows you to recover after taking damage. |
| Ammunition | Very High | Required to continue fighting. |
| Attachments | Medium | Can improve weapon handling and effectiveness. |
| Throwables | High | Useful for attacking, defending, and repositioning. |
How to Choose a Good Landing Spot
Your landing location should match your objective. If you want fast combat practice, a crowded area may be appropriate. If your goal is to reach the late game, a quieter location can give you more time to collect equipment and understand the current zone.
Before jumping, consider the flight path and how many players are likely to land around you. Landing directly in a heavily contested area can result in an immediate fight where your equipment depends heavily on luck. Landing slightly away from the most popular buildings may provide a safer opportunity to find weapons before engaging.
Hot Drop Strategy
Hot drops are areas where many players land. They can provide excellent combat experience because you are likely to encounter opponents quickly. However, hot drops also carry a high risk of early elimination.
If you choose a hot drop, prioritize finding a weapon immediately. Do not spend time collecting unnecessary items before securing a firearm. Once you have a usable weapon, armor, and ammunition, evaluate nearby enemies before continuing to loot.
Quiet Landing Strategy
Quiet areas can be useful for players who prefer a slower start. You can collect equipment, organize your inventory, and plan your rotation before encountering larger groups of opponents.
The disadvantage is that quieter locations may not always contain enough high-level equipment, and you may need to travel farther to reach the next zone.
First Priority After Landing
The first few seconds after landing are critical. Your immediate objective should be finding a weapon. A basic weapon is usually more valuable than spending time searching for the perfect armor or attachment while another player may already be nearby.
Once you have a weapon, look for ammunition. Then prioritize armor and a helmet. After those basic survival items are secured, collect healing items and additional ammunition.
| Priority | Item | Objective |
|---|---|---|
| 1 | Weapon | Secure immediate combat capability. |
| 2 | Ammunition | Ensure the weapon can be used effectively. |
| 3 | Armor | Increase survivability. |
| 4 | Helmet | Improve head protection. |
| 5 | Healing | Prepare for damage recovery. |
| 6 | Secondary Weapon | Cover another combat range. |
| 7 | Attachments | Improve weapons after basic equipment is secured. |
| 8 | Throwables | Prepare for tactical situations. |
Choosing the Right Primary Weapon
Your primary weapon should match the ranges where you are most comfortable fighting. Versatile automatic weapons are popular because they can handle a variety of situations. Other weapons can be more specialized for close or long-range encounters.
When selecting a primary weapon, consider the ammunition you have available, the attachments you can find, your ability to control recoil, and the types of fights you expect to encounter.
Assault Rifles
Assault rifles are versatile choices for many situations. They can be effective in medium-range combat and can also work at shorter distances when handled correctly. Players who are learning the game often benefit from practicing with a consistent assault rifle setup.
Submachine Guns
Submachine guns are useful when fights happen at close range. Their characteristics can make them suitable for building fights and aggressive pushes. They can also be easier for some players to control during rapid close-range engagements.
Designated Marksman Rifles
Designated marksman rifles can provide strong options for medium and long-range engagements. They are useful when you want more range than a typical assault rifle while retaining a faster follow-up capability than many traditional sniper weapons.
Sniper Rifles
Sniper rifles are designed for long-range precision. They can be extremely effective from strong positions, especially when opponents are exposed. However, they require accuracy and patience.
Building a Balanced Weapon Combination
A good weapon combination should cover multiple distances. Carrying two weapons that perform almost exactly the same role can leave you vulnerable in certain situations.
| Combination | Strength | Suitable For |
|---|---|---|
| Assault Rifle + Sniper Rifle | Versatile range coverage | Players who enjoy medium and long-range combat. |
| Assault Rifle + SMG | Strong close and medium range | Aggressive players. |
| DMR + SMG | Long and close range | Players comfortable switching weapons. |
| Shotgun + Assault Rifle | Close and medium range | Building fights and flexible rotations. |
Understanding Ammunition Management
Carrying too little ammunition can leave you helpless during a long fight. Carrying too much ammunition can consume backpack space that could be used for healing items and tactical equipment.
The correct amount depends on your weapons, shooting habits, and match stage. During the early game, you may want enough ammunition to handle several fights. Later, inventory space may become more important because you need healing items and throwables.
Do Not Carry Every Ammo Type
If your weapons use different ammunition types, remember that each type occupies inventory space. Try to build a loadout where ammunition management remains simple and efficient.
Backpack Management Tips
Backpack management is an underrated PUBG skill. Players often pick up everything they see and then discover that their inventory is full when they find an important item.
Regularly review your backpack. Remove excess ammunition, unnecessary attachments, and items you are unlikely to use. Keep enough healing resources and tactical equipment for future engagements.
| Inventory Problem | Solution |
|---|---|
| Too much ammunition | Drop excess rounds that you are unlikely to use. |
| Duplicate attachments | Keep only attachments useful for your current weapons. |
| Not enough healing | Prioritize recovery items over low-value loot. |
| Backpack constantly full | Review inventory after major looting sessions. |
| Too few throwables | Reserve space for tactical equipment. |
Understanding Weapon Attachments
Attachments can improve weapon performance, but not every attachment is equally valuable in every situation. Players should understand what each attachment does and select equipment based on their weapon and preferred combat style.
Optics
Optics improve visibility and can make it easier to aim at different distances. The best optic depends on the range of your expected engagements and your personal comfort.
Magazines
Magazine attachments can improve ammunition capacity or reload characteristics depending on the weapon and attachment type. They can be particularly useful when fighting multiple enemies.
Grips
Grip choices can influence weapon handling and recoil behavior. Experiment with available options and learn which setup gives you the most consistent control.
Muzzles
Muzzle attachments can influence recoil, sound, and other weapon characteristics depending on the item. Choose them according to the situation rather than automatically assuming one attachment is always superior.
Healing Items You Should Prioritize
Health management is essential because surviving a fight is not enough if you remain vulnerable to the next enemy. After an engagement, find a safe location before using healing items whenever possible.
Do not begin healing while standing in an exposed position. Move behind suitable cover and listen for enemy footsteps or gunfire before committing to the healing animation.
Healing After a Fight
Players sometimes become excited after winning an engagement and immediately start looting. This can be dangerous. First check whether other enemies are nearby, reload your weapons, restore health, and then loot when the area appears safe.
Why Throwables Matter
Throwables provide options that guns alone cannot provide. They can force opponents out of cover, block vision, create opportunities for movement, or help defend a position.
Learning to use throwables effectively can make a significant difference in difficult situations, particularly when opponents are hiding inside buildings or behind strong cover.
Using Smoke for Movement
Smoke can provide temporary concealment during rotations, revives, or repositioning. When crossing open terrain, properly placed smoke can give you additional options.
Using Frag Grenades
Frag grenades can pressure enemies behind cover. Rather than throwing them randomly, consider where the opponent is located and where they may move when pressured.
Using Tactical Equipment
Different tactical items can serve different purposes. Carry a mixture that fits your play style and learn their timing through practice.
Looting Buildings Efficiently
When entering a building, avoid opening every container or searching every corner if you already have enough equipment. Develop a fast looting route through familiar building types.
Move through rooms systematically while watching doors, windows, stairs, and potential enemy positions. If you hear footsteps, stop focusing on loot and prepare for combat.
Looting After Eliminating an Enemy
Enemy crates can contain valuable equipment, but they are also dangerous because other players may know that a fight has occurred. Never assume that an elimination means the area is safe.
Before looting, reload your weapon, heal if necessary, and scan nearby positions. If you need something specific, take it quickly instead of standing over the crate for too long.
How to Rotate After Looting
Once you have enough equipment, your next objective should be positioning. Look at the safe zone and determine whether you need to move immediately or can remain in your current area.
Good rotations consider terrain, roads, buildings, hills, bridges, open fields, and potential enemy positions. Avoid entering predictable routes when alternative paths provide better cover.
Early Rotation
Moving early can help you reach valuable positions before other players. This can be particularly useful when you are far outside the upcoming safe zone.
Late Rotation
Late rotation can sometimes allow you to remain in cover while other players move first. However, waiting too long can create unnecessary risk. Always make sure you have enough time to reach safety.
Looting in the Mid Game
Mid-game looting should be more selective than early-game looting. By this stage, you should already have a functional weapon setup, armor, healing, and ammunition.
Instead of searching every building, focus on replacing weak equipment, collecting important attachments, increasing your healing supply, and preparing for late-game fights.
Late-Game Looting Strategy
Late-game looting is dangerous because the number of remaining players is smaller and many enemies may be positioned near the next zone. Avoid unnecessary detours simply to obtain a slightly better attachment.
At this stage, survival and positioning usually become more important than improving an already functional loadout.
How to Avoid Common Looting Mistakes
One common mistake is spending too much time searching for a perfect weapon. Another is carrying unnecessary items because players are afraid they may need them later. Good players understand that inventory space is a resource.
Another mistake is looting immediately after an enemy is eliminated. The gunfire may have attracted another player. Always consider the possibility of a third-party attack.
| Common Mistake | Why It Is Dangerous | Better Habit |
|---|---|---|
| Over-looting | Wastes time and increases exposure. | Loot only what you need. |
| Ignoring armor | Reduces survivability. | Prioritize useful armor early. |
| Carrying too much ammo | Consumes backpack space. | Keep a practical amount. |
| Ignoring healing | Leaves you vulnerable after fights. | Maintain a reliable healing supply. |
| Looting exposed crates | Can attract third-party attackers. | Check surroundings first. |
| Ignoring the zone | Can force dangerous rotations. | Monitor the map regularly. |
How Map Knowledge Improves Looting
Map knowledge makes looting faster. When you know where buildings, roads, hills, compounds, and major landmarks are located, you can make decisions without spending too much time studying the map.
Learning popular landing areas is also useful because you can predict where enemies are likely to appear. With experience, you can understand which areas are likely to produce early combat and which routes may be safer for rotations.
Balancing Looting and Fighting
Looting and combat should not be treated as separate activities. Every loot decision should support your overall strategy. If you are already well-equipped, continuing to search for minor upgrades may not be worth the risk.
Likewise, fighting an enemy simply because you hear gunfire can be a poor decision. Ask yourself whether winning the fight will provide useful equipment, improve your position, or create a safer route. If not, avoiding the engagement may be the better choice.
Tips for New PUBG Players
New players should first learn the fundamentals instead of trying to copy professional players immediately. Focus on finding a weapon quickly, maintaining health, understanding the safe zone, using cover, and practicing aim.
Do not become frustrated by early eliminations. PUBG has a learning curve, and each match can teach you something about positioning, movement, weapons, or decision-making.
Practice Without Chasing Wins
Trying to win every match can create unnecessary pressure. Use some matches to practice specific skills. For example, spend one session focusing on close-range combat and another on long-range aiming or rotation decisions.
Advanced Looting Mindset
Experienced players often think about information as part of their loot strategy. Every building you enter, every sound you hear, and every enemy you observe provides information about the match.
For example, if an area has already been looted, you may assume another player passed through recently. Open doors, missing items, vehicle locations, gunfire, and footsteps can all provide clues. PUBG rewards players who combine equipment with information.
Preparing for the Final Circle
By the final circles, your inventory should be organized and ready. You should have suitable weapons, enough ammunition, healing resources, and tactical equipment. You should also understand your surroundings and identify possible cover.
Avoid unnecessary inventory changes during the final moments. The late game is usually about positioning, timing, awareness, and controlled engagements rather than collecting additional loot.
Final PUBG Looting Checklist
| Task | Completed Objective |
|---|---|
| Find a weapon | Secure early combat capability. |
| Collect ammunition | Maintain enough rounds for engagements. |
| Find armor and helmet | Improve survivability. |
| Collect healing items | Prepare for damage recovery. |
| Choose balanced weapons | Cover different combat ranges. |
| Organize backpack | Prevent unnecessary inventory clutter. |
| Collect useful attachments | Improve weapon handling where appropriate. |
| Carry tactical equipment | Prepare for difficult engagements. |
| Check the safe zone | Plan the next rotation. |
| Stop unnecessary looting | Prioritize survival and positioning. |
Conclusion
Looting is one of the foundations of successful PUBG gameplay. The goal is not to collect everything you find but to build an efficient loadout that supports your strategy. Start by securing a weapon and ammunition, then prioritize protection, healing, and a balanced secondary weapon. Once your essential equipment is ready, focus on positioning and movement instead of endlessly searching for upgrades.
Good loot becomes much more valuable when combined with smart decisions. Learn to recognize dangerous landing zones, understand when to fight, manage your backpack, use attachments effectively, and rotate according to the safe zone. Always remember that a strong loadout cannot compensate for poor positioning or unnecessary risks.
As you gain experience, your looting speed will naturally improve. You will learn which items matter most, which buildings are worth searching, and when it is time to stop looting and move. With practice, map knowledge, and disciplined decision-making, you can turn the first few minutes of every PUBG match into a strong foundation for reaching the late game and competing for the final victory.