
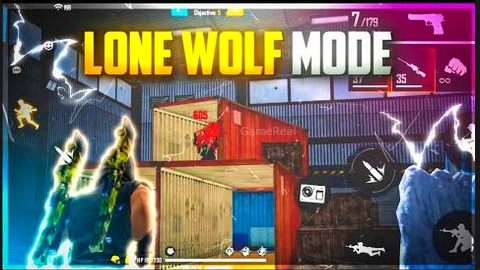
Free Fire Lone Wolf Duel of Honor: How 1v1 Works
Free Fire has always thrived on pure skill moments. Nothing tests that better than Lone Wolf, the 1v1 (and 2v2) mode players often call the true Duel of Honor. No teammates to carry you. No random loot luck. No long plane rides or zone pressure. Just you, one opponent, a tight arena, and the question of who is sharper under pressure. This mode strips everything down to aim, movement, utility timing, and decision-making. It remains one of the best places to measure yourself and improve fast.
Below is a clear, complete breakdown of how Lone Wolf works, what makes rounds go your way, strong weapons and characters, practical tactics, and a full rundown of the OB55 update that launched around mid-September 2026. Everything is based on the official patch information and the established mode rules that have stayed consistent since the mode first appeared.
How Lone Wolf 1v1 Works – The Core Rules
Lone Wolf is a round-based duel mode played on the compact Iron Cage map. The arena is a small warehouse packed with crates, containers, and cover pieces. Both players (or both teams in 2v2) spawn on opposite sides. Because the space is tight, almost every fight happens at close or mid-close range. There is no shrinking safe zone and no scavenging phase. The fight is the entire point.
A match follows a best-of-nine format. The first player or team to win five rounds takes the match. Each round starts with both sides receiving the same basic armor and a fixed set of utility items. Typical starting loadout includes two Gloo Walls, grenades of different types, and Med Kits. This keeps the start fair. Character skills remain fully active, so your chosen abilities matter every round.
Weapon selection uses a turn-based system. One side chooses the weapon (or weapons) for a stretch of rounds, then the other side gets its turn. The same weapon can be selected more than once. This means you will sometimes fight with a gun your opponent picked. Comfort across several weapon categories becomes more important here than in almost any other mode. You usually get a short window at the start of the round (around ten seconds in classic versions) to lock in your choice and prepare.
In the 2v2 version the same round structure and map apply. Teammates can revive each other when downed in some iterations, adding a layer of coordination that pure 1v1 does not have. Whether you queue solo or with a partner, the mode rewards clean mechanics and smart use of the limited space.
Matches are short and intense. That makes Lone Wolf excellent practice. Every round gives direct feedback on your crosshair placement, movement, Gloo Wall timing, and ability usage. Skills sharpened here transfer directly into Battle Royale close fights and Clash Squad rounds.
The Iron Cage Map and Why Positioning Wins Rounds
Iron Cage is symmetrical and small. Cover is everywhere – stacked crates, containers, and walls create constant angles. The middle is usually more open, so smart players work the edges and high ground rather than charging straight across. Spawns sit opposite each other, and certain elevated or corner spots let you pre-aim the other side if the opponent is careless.
Movement is everything. Standing still makes you an easy target. Strong duelists keep moving, break line of sight with crates, peek from unexpected angles, and only commit when they have a read. Crosshair placement at head height before you swing a corner decides many fights before the first shot is even fired. Strafing while shooting and changing direction instead of backpedaling in a straight line makes you harder to track.
High ground on containers or elevated crates gives better angles and makes it easier to control the pace. There are few true camping spots that last long because the map is so compact. Continuous movement mixed with short pauses behind cover tends to outperform pure aggressive rushes or pure passive holding.
Best Weapons for Close-Range Duels
Close-range power rules Iron Cage. Shotguns and submachine guns dominate for good reason.
The M1887 remains a top pick for raw burst. A clean shot can end a round instantly, but the limited magazine punishes misses hard. Players who land the first accurate blast often win the exchange. Alternatives like the MAG-7 or M1014 offer more forgiveness with larger magazines and easier follow-up shots.
Among SMGs the MP40 stands out for its extreme rate of fire. It melts targets at close range when you can hold the aim. The UMP trades a bit of raw speed for better control and armor penetration, making it a safer all-rounder. Groza works well when a round pushes the fight a little farther and you need something reliable across distances.
Because weapon choice rotates, the real advantage goes to players comfortable with both a high-burst shotgun and a high-fire-rate SMG. When your opponent picks something outside your comfort zone, adaptability decides the round more than any single gun.
Character Skills That Matter in 1v1
Skills stay active and can swing tight fights. Healing and protective abilities generally outperform pure offensive ones because rounds are short and health advantage compounds quickly.
Jota’s Sustained Raids passive restores health on eliminations with SMGs or shotguns and gives a small heal while dealing damage with those weapons. In aggressive 1v1 or 2v2 play this creates a strong snowball effect. DJ Alok’s Drop the Beat still offers excellent sustain and movement speed through its healing aura. Chrono’s Time Turner creates a strong damage-blocking field that can save a round when used at the right moment, though the cooldown limits how often you get it.
Other solid options include abilities that improve armor effectiveness, energy-to-health conversion, or temporary mobility. Choose based on your play style: aggressive players lean toward healing-on-kill or speed skills, while more methodical duelists prefer defensive barriers. The best Lone Wolf players treat the skill as part of the loadout plan rather than an afterthought.
Utility Items – The Difference Between Winning and Losing
Every round starts with the same Gloo Walls, grenades, and Med Kits. Players who treat them as active tools win more than those who save them for emergencies.
Gloo Walls are the most important. Deploy one the instant you take the first hit of an exchange. A well-timed wall blocks a shotgun blast, creates a healing window, or cuts an angle the opponent was relying on. Grenades force opponents out of cover in a map where escape space is limited. Med Kits should be used the moment you break contact rather than held until later. Entering the next engagement at full health is almost always better than holding an unused kit.
Mastering the timing of these three items separates consistent winners from players who rely only on aim.
Practical Tips to Win More Rounds
Pre-aim common angles from your spawn and from the main cover pieces. Keep your crosshair at head level. Use the first few seconds of each round to listen and watch for movement rather than rushing immediately. When you do push, do it with a Gloo Wall ready and a plan for the next cover piece.
In 2v2, communication about who holds which side and when to revive becomes decisive. Call outs on utility usage prevent both players from wasting the same resource at the same time.
Because the mode is pure skill, mental composure matters. Losing the first two rounds does not end the match. Stay calm, adjust weapon comfort if needed, and focus on winning the next individual exchange. Short matches also make it easy to review what went wrong after each game and correct one habit at a time.
Lone Wolf rewards fundamentals more directly than almost any other Free Fire mode. Time spent here improves aim, movement, and decision speed that carry into every other playlist.
Free Fire OB55 Update: Full Patch Notes, New Features and Changes
OB55 arrived in mid-September 2026 and brought a major content wave centered on the return of the NARUTO SHIPPUDEN collaboration, significant Battle Royale and Clash Squad adjustments, character reworks, new random events, device system changes, and quality-of-life improvements.
NARUTO SHIPPUDEN Chapter 1 Returns
The collaboration is back in full force across modes.
In Battle Royale the Nine Tails event can trigger at the start of a match. Possible effects include the plane catching fire from a Tailed Beast Bomb so everyone is forced to eject early, Arsenals opening without keys on Bermuda, or a crater filled with loot appearing. Mid-match, Sharingan Control points can appear. Capturing one lets a player select an area that receives a Tailed Beast Bomb dealing heavy explosive damage in a wide radius, followed by flame spots that burn players over time.
The Hidden Leaf Village returns as a location and also becomes the default cabin on all maps. A new Ninja Academy building is available with an interactable swing that grants a permanent five percent movement speed boost when used.
Revival Points receive a Reanimation Jutsu visual and mechanical update. When a Revival Point is fully captured, fallen teammates rise from stone coffins instead of parachuting in, complete with brief protection and supplies. Gamakichi summoning scrolls appear across the map for extra battle supplies.
Clash Squad also receives the ninja treatment. Ninjutsu and kunai become available in the store. The first round uses shurikens instead of pistols. Cyber Airdrops become Ninjutsu Scroll Airdrops. Hidden Leaf Village joins the map pool.
Ninjutsu Skills and Ninja Tools
Players can pick up ninjutsu skill cards in Battle Royale. New and returning options include:
- 8 Trigrams Palm Rotation (new): dash forward and create a rotating chakra shield for 3.5 seconds that knocks back enemies, deals damage, absorbs bullets, and deflects some throwables.
- Fireball Jutsu: explosive fireball with burn damage over time that also affects Gloo Walls.
- Water Dragon Jutsu: explosive water ball with a brief view-blocking effect.
- Great Breach: air blasts that slow enemies and reduce their rate of fire.
- Rasengan and Chidori: high-damage dashes with different control effects.
- Cherry Blossom Clash: dash with knockback.
Shuriken and Kunai return as secondary weapons. Light and Heavy Shuriken offer different close- and mid-range options. Fiery, Lightning, and Wind Kunai add explosive elemental effects that burn, disable throwables and minimap, or slow targets.
Battle Royale Adjustments
New random events arrive with the patch, including the Naruto collaboration event, Peak Mania (more SMGs, shotguns and melee in Peak on Bermuda), Razing Storm, and Weapon Surge variants that boost specific weapon types. A “No Random Event” option also exists. Additional events such as Airdrops turning into meteors and Black Friday vending machine discounts follow later.
Airdrop timing and loot receive major changes. Regular Airdrops begin around the 160-second mark with four per match and clearer indicators. Two Defense Airdrops land together later with increased quantity and quality of loot. One Ultra Airdrop still appears and continues to grant level 5 armor plus teammate revives on capture.
The device system is reworked. Devices now split into active and passive categories. Players can carry one of each. Active devices include skill cards, Launch Pad, Supply Box, UAV-Lite, Mini Turret, and Portal Go. Passive devices include Dragon Sprinters, Jammer, and the new Horizaline.
A new Follow mechanic lets players form “trains.” Use the Train emote or the follow button to join or start a line of players moving together. Certain combat actions break the train for the affected player while the rest continue.
Other Battle Royale changes include the ability to preview and switch weapons while parachuting after revival, helping teammates up without interrupting Med Kit use, optimized downhill movement, clearer Vending Machine interface, Coin Jars added to ground loot, weapons able to break arsenal glass, and Solo Revival window shortened from 540 to 410 seconds. Safe Zone timing on Solara is aligned with other maps.
Clash Squad Changes
New throwables arrive: Flame Grenade creates a lasting burning area that damages players and melts Gloo Walls; Sonar Grenade scans and reveals enemies in a radius; Smoke Grenade effect is updated to match the Tactical Market version. Map optimisations improve minimap detail on Kalahari and Purgatory, remove problematic narrow railings, and adjust building edges on Bermuda so players can no longer stand or shoot from certain outer edges.
Character Rework and Balance
Kenta receives a full skill overhaul. The new kit features a tempest that passes through Gloo Walls for rapid teleportation combined with Shield Point-based damage reduction. The result is a more versatile fighter who balances offense and defense. Additional balance adjustments affect other characters, though the full list focuses on making Kenta the headline change.
Quality-of-Life and System Improvements
Many smaller but welcome changes improve the overall feel: clearer target-marking voice lines based on distance, optimized recommended drop points, better Gloo Wall visual effects on slides, HUD improvements around Vending Machines and Inhalers, and more detailed damage information after elimination. Training Grounds now track battle history with eliminations, headshot rate, and KDA for easier self-review.
OB55 keeps the core Free Fire loop intact while layering high-energy Naruto content, tighter airdrop control, more tactical device options, and the Follow train mechanic that adds a social and movement layer. The update also continues the pattern of refining existing systems rather than overhauling everything at once.
Why These Changes Matter for Lone Wolf Players
Although Lone Wolf itself did not receive a complete redesign in OB55, the broader updates still affect the mode. Character skill changes (especially Kenta) alter what is strong in pure 1v1. New ninjutsu and kunai tools can appear in related modes or custom settings and influence the overall combat feel. Improved movement optimisations and utility clarity help every close-range fight, including those inside Iron Cage. The Follow mechanic and device split give more tools for practice and creative custom rooms.
Players who main Lone Wolf should still review the Kenta rework and any weapon balance notes that arrived with the patch, because the same close-range principles that win Iron Cage also decide many Battle Royale and Clash Squad fights.
Final Thoughts
Lone Wolf remains the purest skill check in Free Fire. The rules are simple: best of nine, first to five, equal starting gear, rotating weapon choice, tight map, active character skills. Success comes from consistent aim, smart movement, perfect utility timing, and the ability to adapt when your opponent picks the weapon. Combine that foundation with the new content and systems from OB55 and you have both a sharp training tool and a fun way to experience the latest collaboration.
Whether you queue for a quick 1v1 to warm up or grind for higher consistency, the mode rewards the fundamentals. Master the Iron Cage, learn the utility timings, stay comfortable across the main close-range weapons, and the improvements will show in every other mode you play. The Duel of Honor is still alive and well.